Exposing Your API in Drupal 9 – A Brief Tutorial Sahana N 20 Dec, 2021
Drupal 8 brought about significant architectural changes offering modern techniques to build digital experiences. REST API was one of them and it came shipped in core. A RESTful API is an API that conforms to the architectural style of REST (representational state transfer). It accesses and uses data via HTTP requests to GET, PUT, POST and DELETE data types.
In this post, you will be learning more about exposing your API in Drupal 9.
Drupal 8 has now reached EOL. Now is the time to migrate to Drupal 9. However, if you’re still trying your hands out at creating a custom module in Drupal 8, these methods will work for a Drupal 8 setup too.
HTTP methods used in REST API
GET : This method is used to read the data from server.
POST : This method is used to create data on a server.
PATCH : This method is used to update the data on the server.
DELETE : This method is used to delete the data from the server.
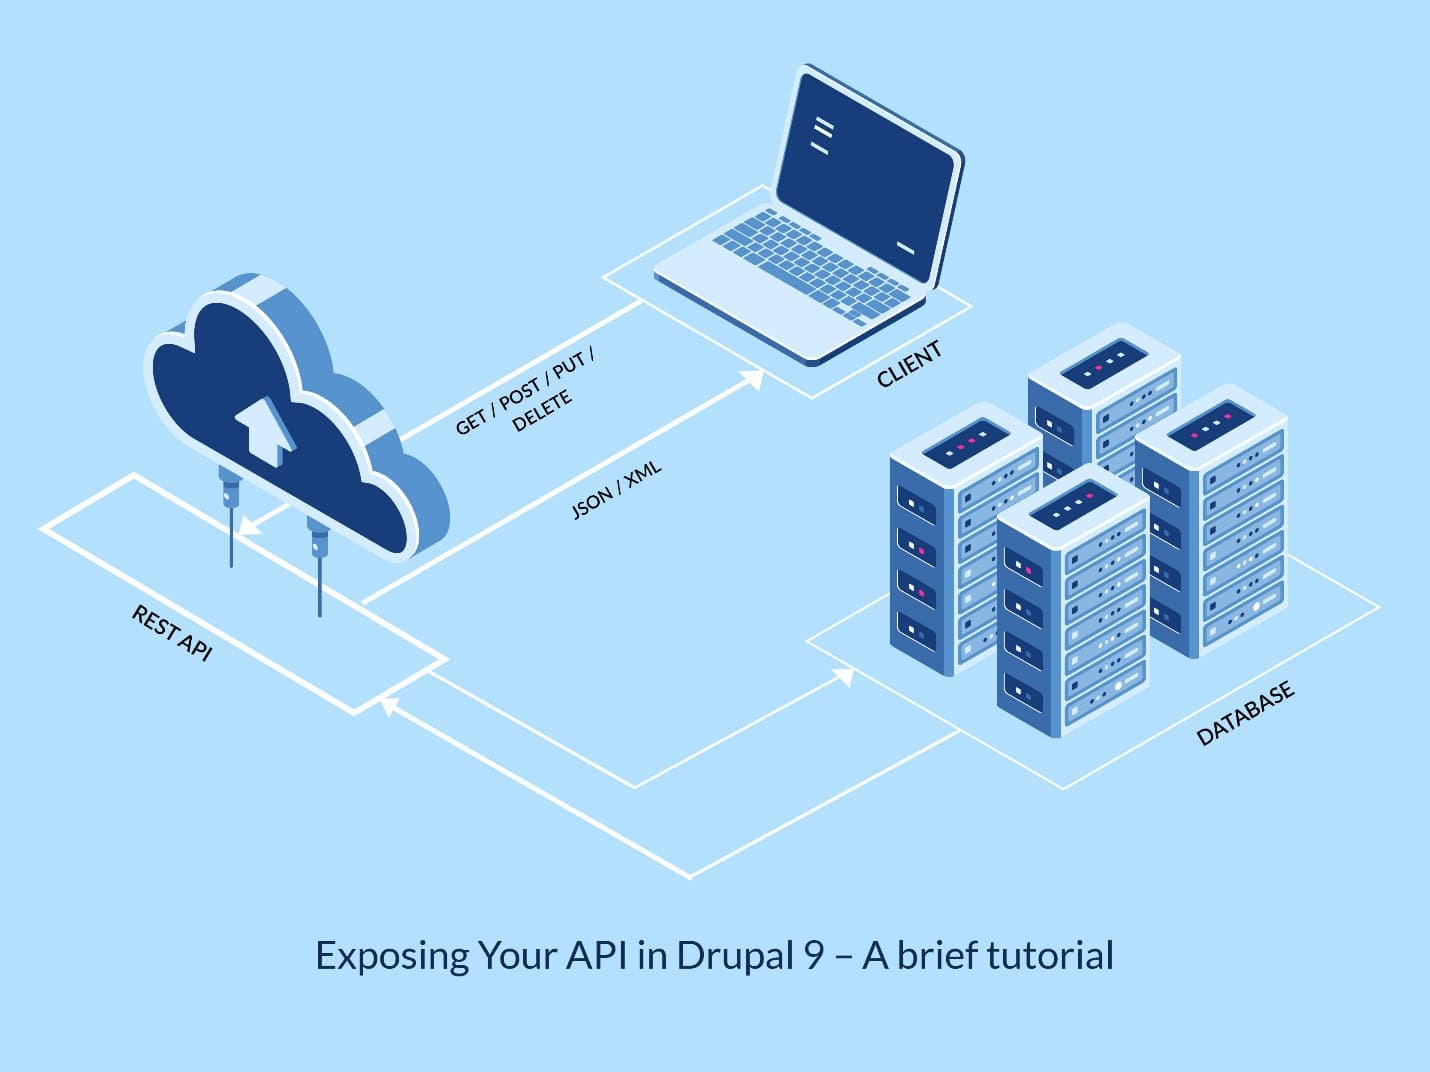
The above image describes how REST API requests and gives the response to a client. Initially the client sends the request using HTTP methods. REST API interacts with the database and sends the response in JSON or XML formats.
Now let’s see how it take place in Drupal.
Drupal Modules to Expose your API
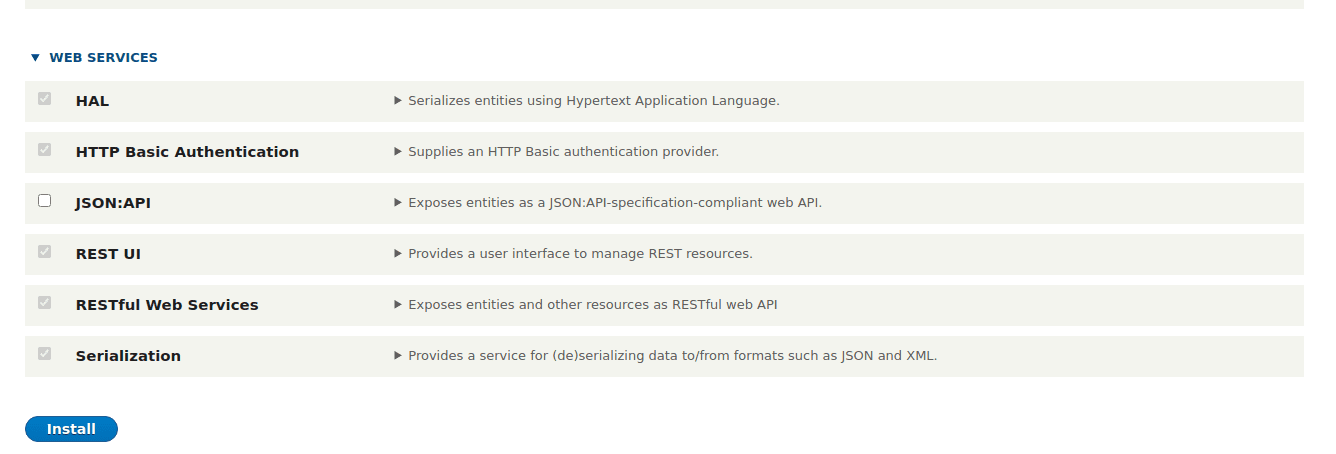
Mentioned below are some Drupal core and contributed modules that can help in exposing your APIs in Drupal.
1. HAL
The HAL module is specifically for JSON or XML, and it provides the serialization plugin.
2. HTTP Basic Authentication
The HTTP basic authentication module provides an authentication plugin which allows us to control access to our API resources based on the HTTP method.
3. RESTful Web Services
The RESTful web services module handles the resources plugin system as well as defining initial resource routes. A good example of resource plugin can be found in the DB log module which provides an API endpoint for watchdog entries.
Resource plugin is responsible for retrieving the data from the database.
4. Serialization
The serialization module is responsible for deserializing and serializing request response data.
5. REST UI
Rest UI is a helpful module which exposes our RESTful web services configuration via the admin UI. This way we can configure our API endpoints by editing the YML files.
REST Response – How It Works

This image describes the pipeline of the REST response.
According to the image, first the client sends a request, and the request goes to the request handler. The Request Handler is responsible for accepting the request.
The request handler interfaces with the REST module and is responsible for the requests. The requests are then sent to deserialize to normalize the data.
Then deserialize sends to the request handler. The request handler matches the up the resource with the appropriate resource handler.
Again, request is sent to the Resource plugin. The resource plugin takes the data from incoming request and retrieves the valid information from the database.
Then the resource plugin returns the data to the request handler and again acts with the serializer before sending as response.
How to configure the REST API in Drupal using Core Modules:
Here are 4 easy steps to configure REST API in Drupal using core modules:
Step 1: Initially, you need to install the core modules which are HAl, Http Basic Authentication, REST Web Services, and serialization module.
Step 2: Next, you need to download the REST UI module and you need to enable the module.
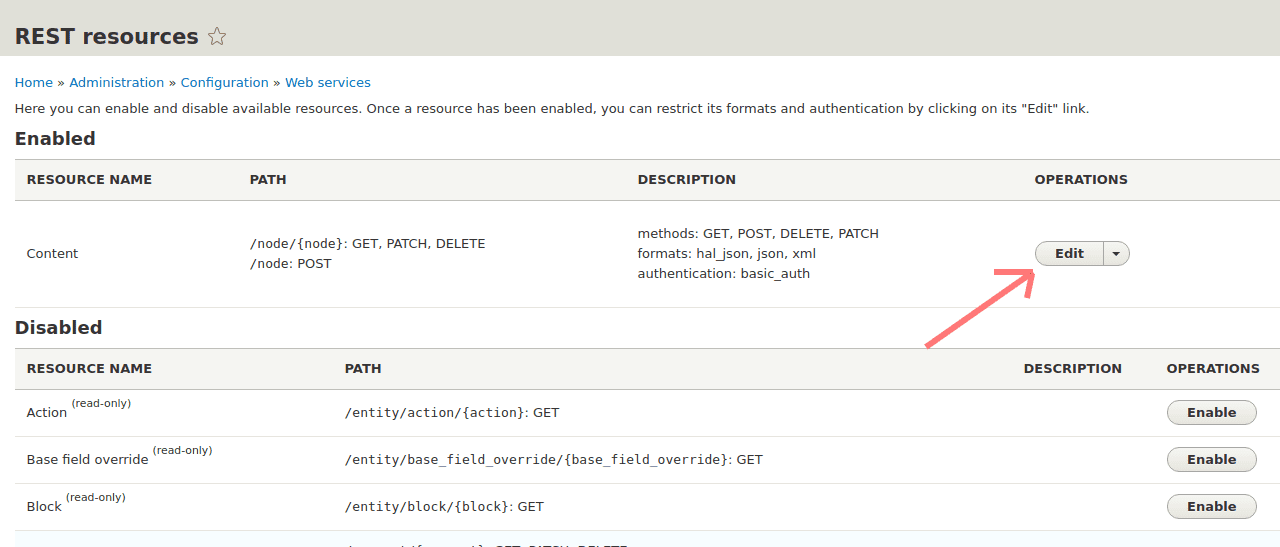
Step 3: Next, you need to configure the REST API endpoints as required. To configure, go to Configuration -> REST -> then click on edit of the content row.
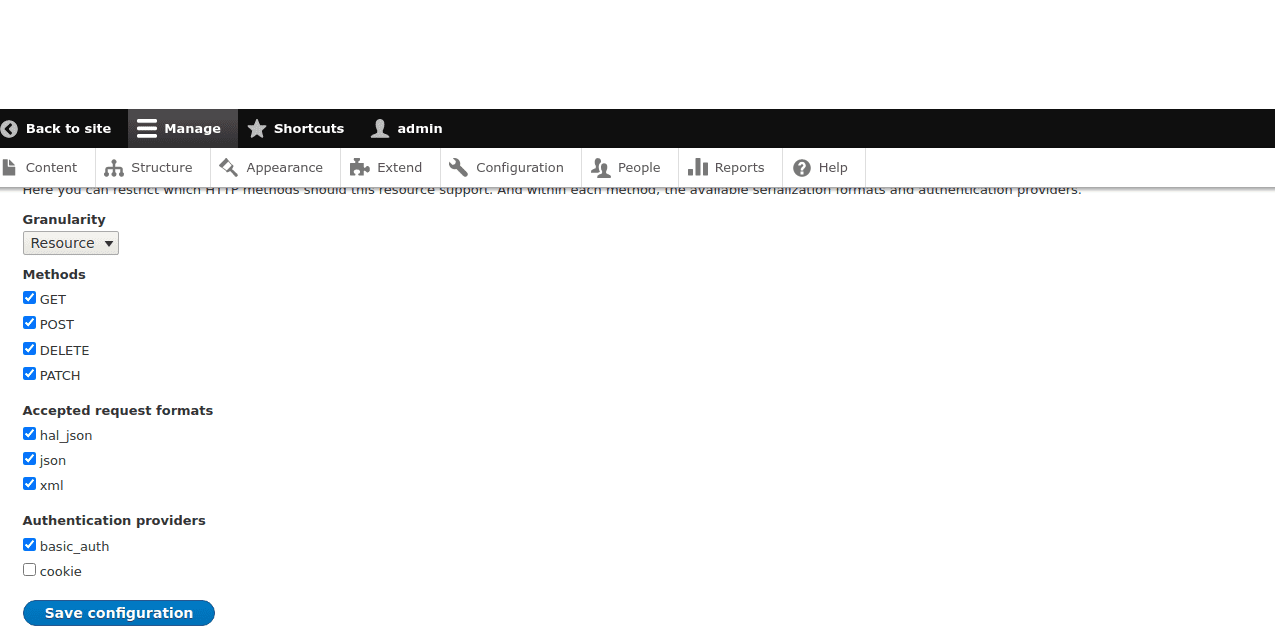
Step 4: When you click on edit, you will get the edit window. Configure as required then save the configuration.
Example:
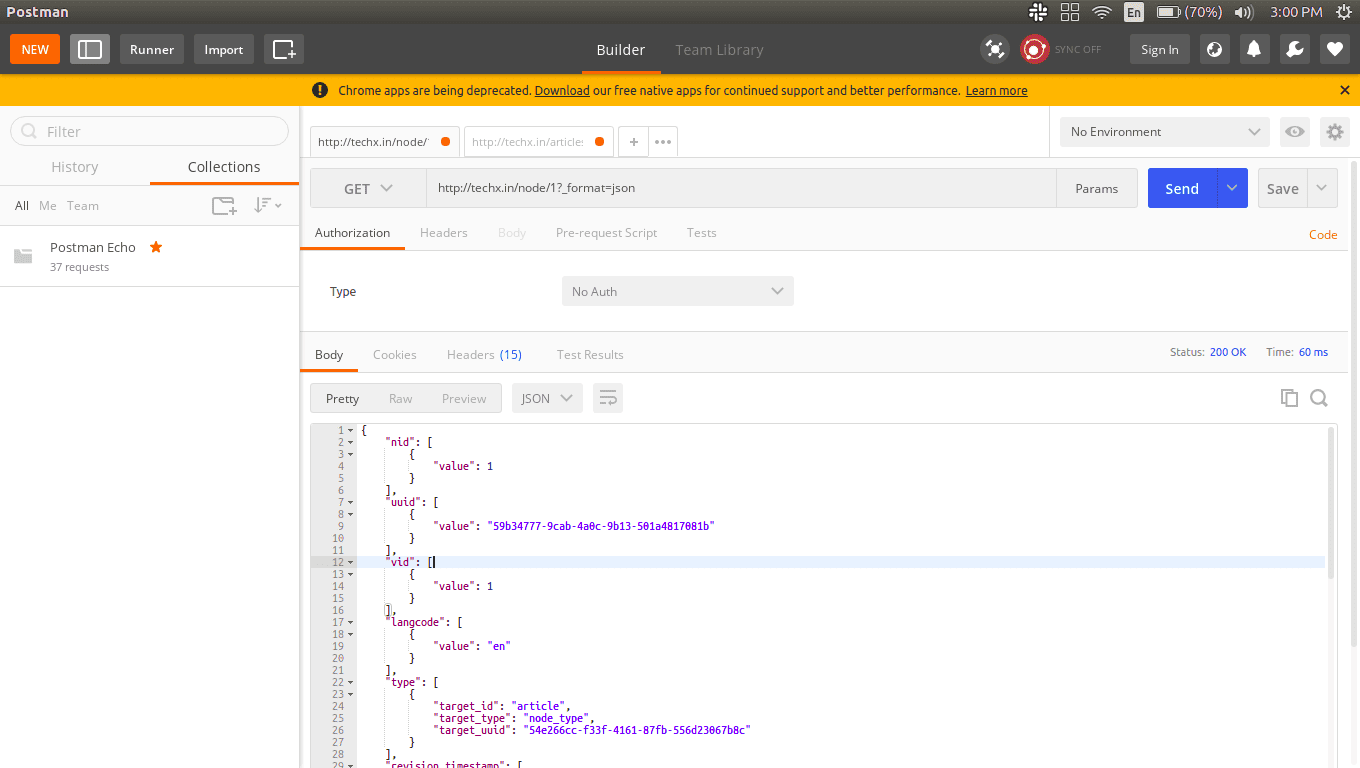
If you want to get the response of a particular node, you need to send the request using the postman app with URL – hostname/node/nodeid?_format=json. (If you don’t have the Postman app yet, you can either download it from here or get the web version.)
Recent Blogs


Featured Success Stories

A Drupal powered multi-site, multi-lingual platform to enable a unified user experience at SEMI.
Discover how our technology enabled UX Magazine to cater to their massive audience and launch outreach programs.

Discover how a Drupal powered internal portal encouraged the sellers at Flipkart to obtain the latest insights with respect to a particular domain.


