You’ve seen a lot of applications that contain video content, like recipe apps with video tutorials, movie apps, and sports-related apps. Have you wondered how to add video content to your next Flutter application?
Implementing video functionality from scratch would be a burdensome task. But there are few plugins available to make developer life easy. The video player plugin is one of the best plugins available for Flutter to fulfill that requirement.
In this article, you will learn how to apply the video player plugin along with controlling the different functionalities of the video player.
We’ll go over these topics:
- Creating a new video player
- Adding play and pause buttons
- Creating a fast forward
- Adding a video progress indicator
- Applying subtitles for video
Creating a new video player
Before using the video player plugin, you should add it to your pubspec.yaml file. When you open the pubspec.yaml file, you can see some configurations and dependencies required to run your app. Our video player plugin should be added under the dependencies block:
dependencies:
  flutter:
    sdk: flutter
  cupertino_icons: ^1.0.2
  video_player: 2.1.15  //video player
The current version of the plugin is 2.1.15, but you can add the latest version in here by checking the plugin page. If you are in VS Code when you save the file, it will download the plugin automatically. If not, open the terminal and write flutter pub get to download the plugin.
Go to the file where you want to add the plugin and import the video_player.dart file:
import 'package:video_player/video_player.dart';
Now you can use the video player plugin in your project.
There are few ways to load video. Let’s load our example from the assets. Create an assets/video folder at the root level of the project and add a video inside that folder. Then in pubspec.yaml, under the assets section, specify the file path as below:
assets:
    - assets/video/video.mp4
Let’s create a separate stateful widget called VideoPlayerWidget to insert our video player–related implementation.
You can initialize the video player inside the initState method like below. Also, don’t forget to dispose the video player to do cleanup work:
class _VideoPlayerState extends State<VideoPlayerWidget> {
  late VideoPlayerController _videoPlayerController;
  @override
  void initState() {
    super.initState();
    _videoPlayerController = VideoPlayerController.asset(
        'assets/video/video.mp4')
      ..initialize().then((_) {
        setState(() {});
        _videoPlayerController.play();
      });
  }

  @override
  void dispose() {
    _videoPlayerController.dispose();
    super.dispose();
  }

  @override
  Widget build(BuildContext context) {
    return Center(
      child: VideoPlayer(_videoPlayerController),
    );
  }
}
VideoPlayerController must specify with the late keyword because we are still not a defined video player controller in that line and we are going to do that later. Inside the initState, videoPlayerController has been initialized along with the path of the asset.
When the initialization is completed, it changes the state and rebuilds the widget. You can start playing the video after initialization.
Instead of assets, you can use the video URL. To access the network, you should add Internet permission configurations to both Android and iOS.
From the root, go to ios/Runner and open the info.plist file. Then, add the following config to that file:
<key>NSAppTransportSecurity</key>
<dict>
  <key>NSAllowsArbitraryLoads</key>
  <true/>
</dict>
Next, go to android/app/src/main and open AndroidManifest.xml. Then, add the following code to it:
<uses-permission android:name="android.permission.INTERNET"/>
Now you can change asset to network and add the video URL there:
  @override
  void initState() {
    super.initState();
    _videoPlayerController =
        VideoPlayerController.network('video_url_here')
          ..initialize().then((_) {
            setState(() {});
            _videoPlayerController.play();
          });
  }
Even though initialization has been done, there should be a way to show the player in the UI. The VideoPlayer widget can be used to do that. To make it work, you should pass the controller as a first argument to the VideoPlayer widget.
It’s better to check whether the initialization is a success before showing the VideoPlayer widget:
  @override
  Widget build(BuildContext context) {
    return Center(
      child: _videoPlayerController.value.isInitialized ? VideoPlayer(_videoPlayerController) : Container(),
    );
  }
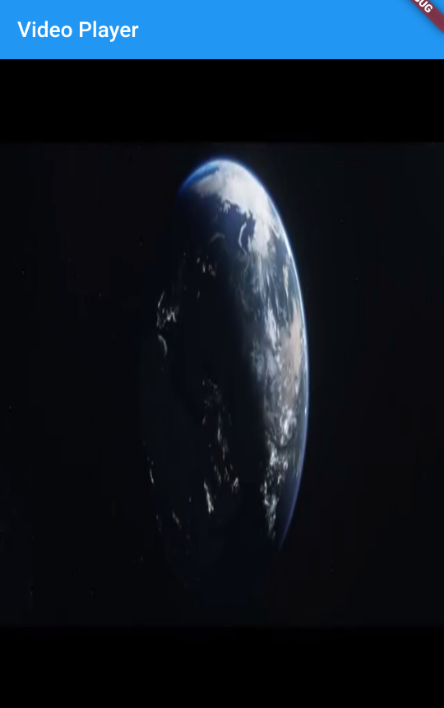
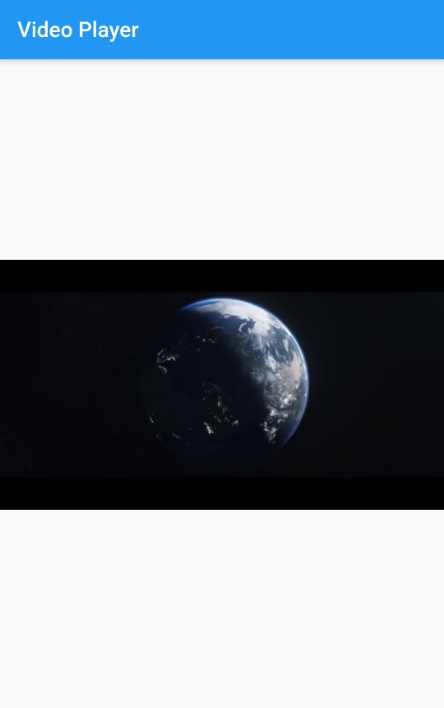
Now you can see the video on the screen. But there is a small issue: it’s not in a proper aspect ratio. That can be fixed by using the AspectRatio widget. The video player provides a proper aspect ratio of the video, and you can use that value to set to an AspectRatio widget:
  @override
  Widget build(BuildContext context) {
    return Center(
      child: _videoPlayerController.value.isInitialized ? AspectRatio(aspectRatio:
      _videoPlayerController.value.aspectRatio,
      child: VideoPlayer(_videoPlayerController)
      ) : Container(),
    );
  }
Now you can see the video with the proper aspect ratio.
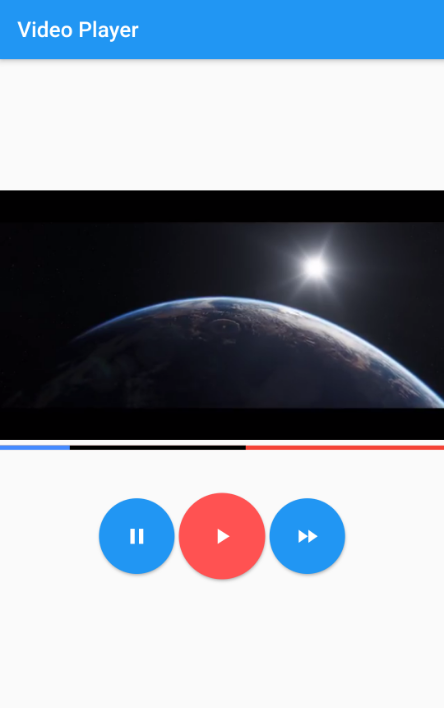
Adding play and pause buttons
First, let’s wrap the video player widget inside a column widget because we should place the play and pause button underneath the player. Inside the column after the player widget, let’s add two ElevatedButton widgets inside a Row widget, and between those buttons let’s add a Padding widget to keep some breathing space.
To each ElevatedButton, add relevant Icons as children widgets. Then inside the play button onPressed callback, you can refer _videoPlayerController and call the play method to start playing the video. Inside the pause button, use the pause method instead of the play.
Now you can remove the play that was added previously inside the initState method:
  @override
  Widget build(BuildContext context) {
    return Column(
      mainAxisAlignment: MainAxisAlignment.center,
      children: [
        _videoPlayerController.value.isInitialized ? AspectRatio(aspectRatio:
        _videoPlayerController.value.aspectRatio,
        child: VideoPlayer(_videoPlayerController)
        ) : Container(),
        Row(
          mainAxisAlignment: MainAxisAlignment.center,
          children: [

            ElevatedButton(onPressed: (){
              _videoPlayerController.pause();
            }, child: Icon(Icons.pause)),
              Padding(padding: EdgeInsets.all(2)),
             ElevatedButton(onPressed: (){
              _videoPlayerController.play();
            }, child: Icon(Icons.play_arrow))
          ],
        )
      ],
    );
  }
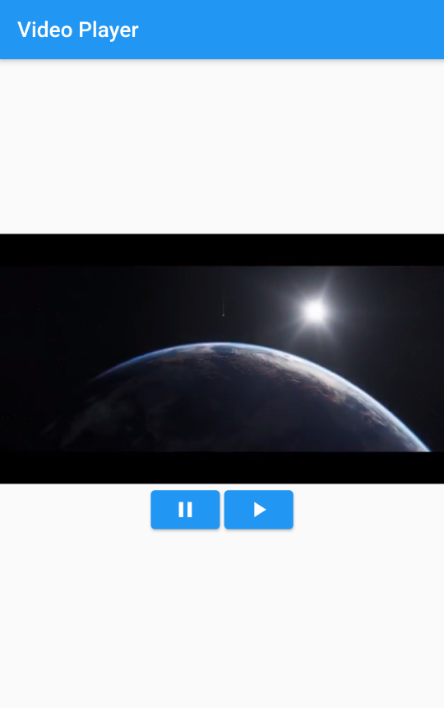
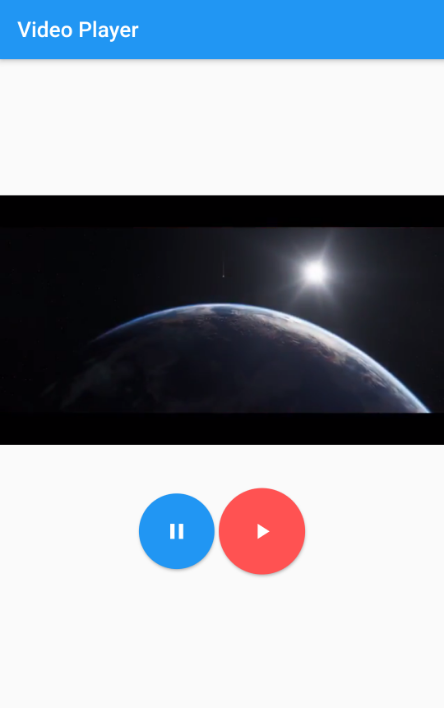
Also, you can add styling to the button to get a rounded-looking button, which is usually in video players:
 @override
  Widget build(BuildContext context) {
    return Column(
      mainAxisAlignment: MainAxisAlignment.center,
      children: [
        _videoPlayerController.value.isInitialized
            ? AspectRatio(
                aspectRatio: _videoPlayerController.value.aspectRatio,
                child: VideoPlayer(_videoPlayerController))
            : Container(),
        Padding(
          padding: EdgeInsets.all(20),
        ),
        Row(
          mainAxisAlignment: MainAxisAlignment.center,
          children: [
            ElevatedButton(
                style: ButtonStyle(
                    backgroundColor: MaterialStateProperty.all<Color>(Colors.blue),
                    fixedSize: MaterialStateProperty.all(Size(70, 70)),
                    shape: MaterialStateProperty.all(RoundedRectangleBorder(
                        borderRadius: BorderRadius.circular(100)))),
                onPressed: () {
                  _videoPlayerController.pause();
                },
                child: Icon(Icons.pause)),
            Padding(padding: EdgeInsets.all(2)),
            ElevatedButton(
                style: ButtonStyle(
                    backgroundColor: MaterialStateProperty.all<Color>(Colors.redAccent),
                    fixedSize: MaterialStateProperty.all<Size>(Size(80, 80)),
                    shape: MaterialStateProperty.all(RoundedRectangleBorder(
                        borderRadius: BorderRadius.circular(100)))),
                onPressed: () {
                  _videoPlayerController.play();
                },
                child: Icon(Icons.play_arrow))
          ],
        )
      ],
    );
  }
Creating a fast forward
Before implementing the fast forward, let’s think about what we need. First, there should be a way to access the current video position/time and a way to set a new value. Controller’s seekTo method allows us to set the duration for the video.
You can access the current video position through the video player value property like below:
ElevatedButton(
       style: ButtonStyle(
          backgroundColor: MaterialStateProperty.all<Color>(Colors.blue),
          fixedSize: MaterialStateProperty.all(Size(70, 70)),
          shape: MaterialStateProperty.all(RoundedRectangleBorder(
              borderRadius: BorderRadius.circular(100)))),
                onPressed: () {
                  _videoPlayerController.seekTo(Duration(
                   seconds: _videoPlayerController.value.position.inSeconds + 10));
                },
                child: Icon(Icons.fast_forward))
Like this, you can also implement the rewind backward by reducing the 10 seconds when users click the button.
Adding a video progress indicator
The video player plugin provides inbuilt functionality to add a progress bar along with some controls. You can use the VideoProgressIndicator widget for that.
As a first parameter, you must pass the controller and set the allowScrubbing property. The allowScrubbing property will allow the user to slide the progress by touching the widget. By enabling this, users can jump to a different timestamp of the video. Also, you can control the seek bar’s background color, buffer color, and played area color individually:
VideoProgressIndicator(
          _videoPlayerController,
          allowScrubbing: true,
          colors: VideoProgressColors(
              backgroundColor: Colors.red,
              bufferedColor: Colors.black,
              playedColor: Colors.blueAccent),
        )
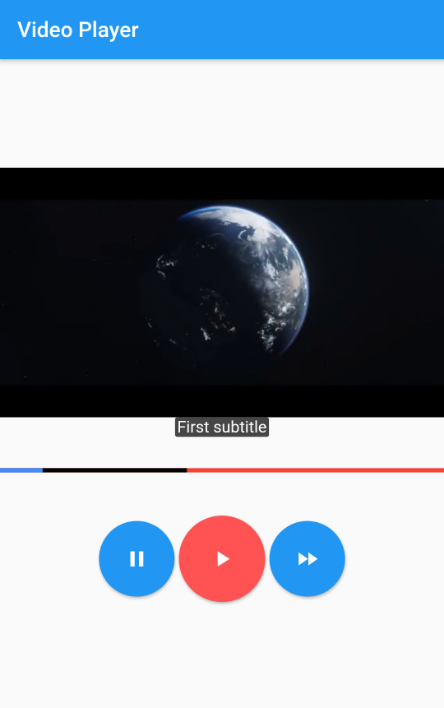
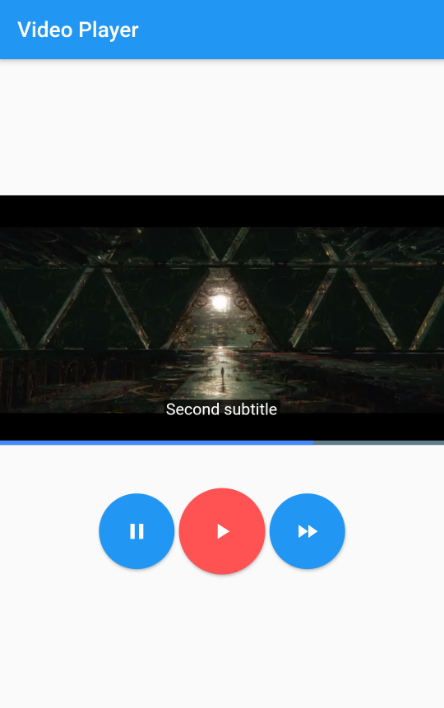
Applying subtitles for video
Subtitles require two things for your app: The first one is the list of paragraphs/words for the different periods, and the second is a way to show those titles when the video is playing. For that, there should be a way to add a listener to the time change.
The video player contains an addListener method that executes every second. You can use this listener to feed subtitles for the video player based on the different time periods.
First, let’s create a Map that contains time as a key and subtitle text as a value. On the Map, time will be in seconds:
Map<int,String> captions = {
    5:"First subtitle",
    20:"Second subtitle"
  };
Next, register a Listener when initializing the video player. Inside the callback, you can check whether the video is playing and get the current time as a second if the video is playing. Then, if the current value contained in captions maps, we can set the value as a selected caption like below:
void initState() {
    super.initState();
    _videoPlayerController =
        VideoPlayerController.asset('assets/video/video.mp4')
        ..addListener(() {
            if(_videoPlayerController.value.isPlaying){
              setState(() {
                if(captions.containsKey(_videoPlayerController.value.position.inSeconds)){
              selectedCaption = captions[_videoPlayerController.value.position.inSeconds];
                }
              });
            }
        })
          ..initialize().then((_) {
            setState(() {});
            _videoPlayerController.play();
          });
  }
Now you can use ClosedCaption to set that selected caption. You can add some styling to the caption text for better visibility:
 ClosedCaption(
     text: selectedCaption,textStyle: TextStyle(fontSize: 15,color: Colors.white),)
But building the main widget every time the caption changes is not good practice. Therefore, we should extract the caption logic to a separate widget.
To register a listener, you should pass the video controller to a newly created child widget.
From there, you can register the listener inside the child widget:
class VCaption extends StatefulWidget {
  const VCaption(
     this.videoPlayerController,
  );
  final VideoPlayerController videoPlayerController;
  @override
  _VCaptionState createState() => _VCaptionState();
}
class _VCaptionState extends State<VCaption> {
  String? selectedCaption = "";
  Map<int,String> captions = {
    5:"First subtitle",
    20:"Second subtitle"
  };

  @override
  void initState() {
    widget.videoPlayerController.addListener(() {
      if(widget.videoPlayerController.value.isPlaying){
              print("Time ${widget.videoPlayerController.value.position.inSeconds}");
              setState(() {
                if(captions.containsKey(widget.videoPlayerController.value.position.inSeconds)){
              selectedCaption = captions[widget.videoPlayerController.value.position.inSeconds];
                }
              });
            }
    });
    super.initState();
  }
  @override
  Widget build(BuildContext context) {
    return ClosedCaption(
      text: selectedCaption,textStyle: TextStyle(fontSize: 15,color: Colors.white),);
  }
}
Now we can add this widget inside the column we created previously and pass the _videoPlayerController as a parameter. You can check whether the video player has been initialized before adding the widget to the tree like below:
_videoPlayerController.value.isInitialized ? VCaption(_videoPlayerController) : Container(),
Instead of showing those subtitles underneath the video, you can use the Stack widget to show those subtitles on top of the video. The caption, along with the progress indicator, have been moved to inside the Stack widget to show it on top of the video:
 Stack(
          children: [
            _videoPlayerController.value.isInitialized
                ? AspectRatio(
                    aspectRatio: _videoPlayerController.value.aspectRatio,
                    child: VideoPlayer(_videoPlayerController))
                : Container(),
            Positioned(
              bottom: 2,
              width: MediaQuery.of(context).size.width,
              child: _videoPlayerController.value.isInitialized
                  ? VCaption(_videoPlayerController)
                  : Container(),
            ),
            Positioned(
                bottom: 0,
                width: MediaQuery.of(context).size.width,
                child: VideoProgressIndicator(
                  _videoPlayerController,
                  allowScrubbing: false,
                  colors: VideoProgressColors(
                      backgroundColor: Colors.blueGrey,
                      bufferedColor: Colors.blueGrey,
                      playedColor: Colors.blueAccent),
                ))
          ],
        )
Conclusion
Using the video player plugin instead of implementing a video player from scratch saves a lot of development time and provides all the required functionality out of the box.
If you want to go beyond these customizations and implement a nice-looking video player that has Material- and Cupertino-inspired design, you can opt for the chewie Flutter plugin.
The post Handling videos in Flutter using a video player plugin appeared first on LogRocket Blog.


